.png)
Complete Guide to the F1 Student Visa Process: From Application to Graduation
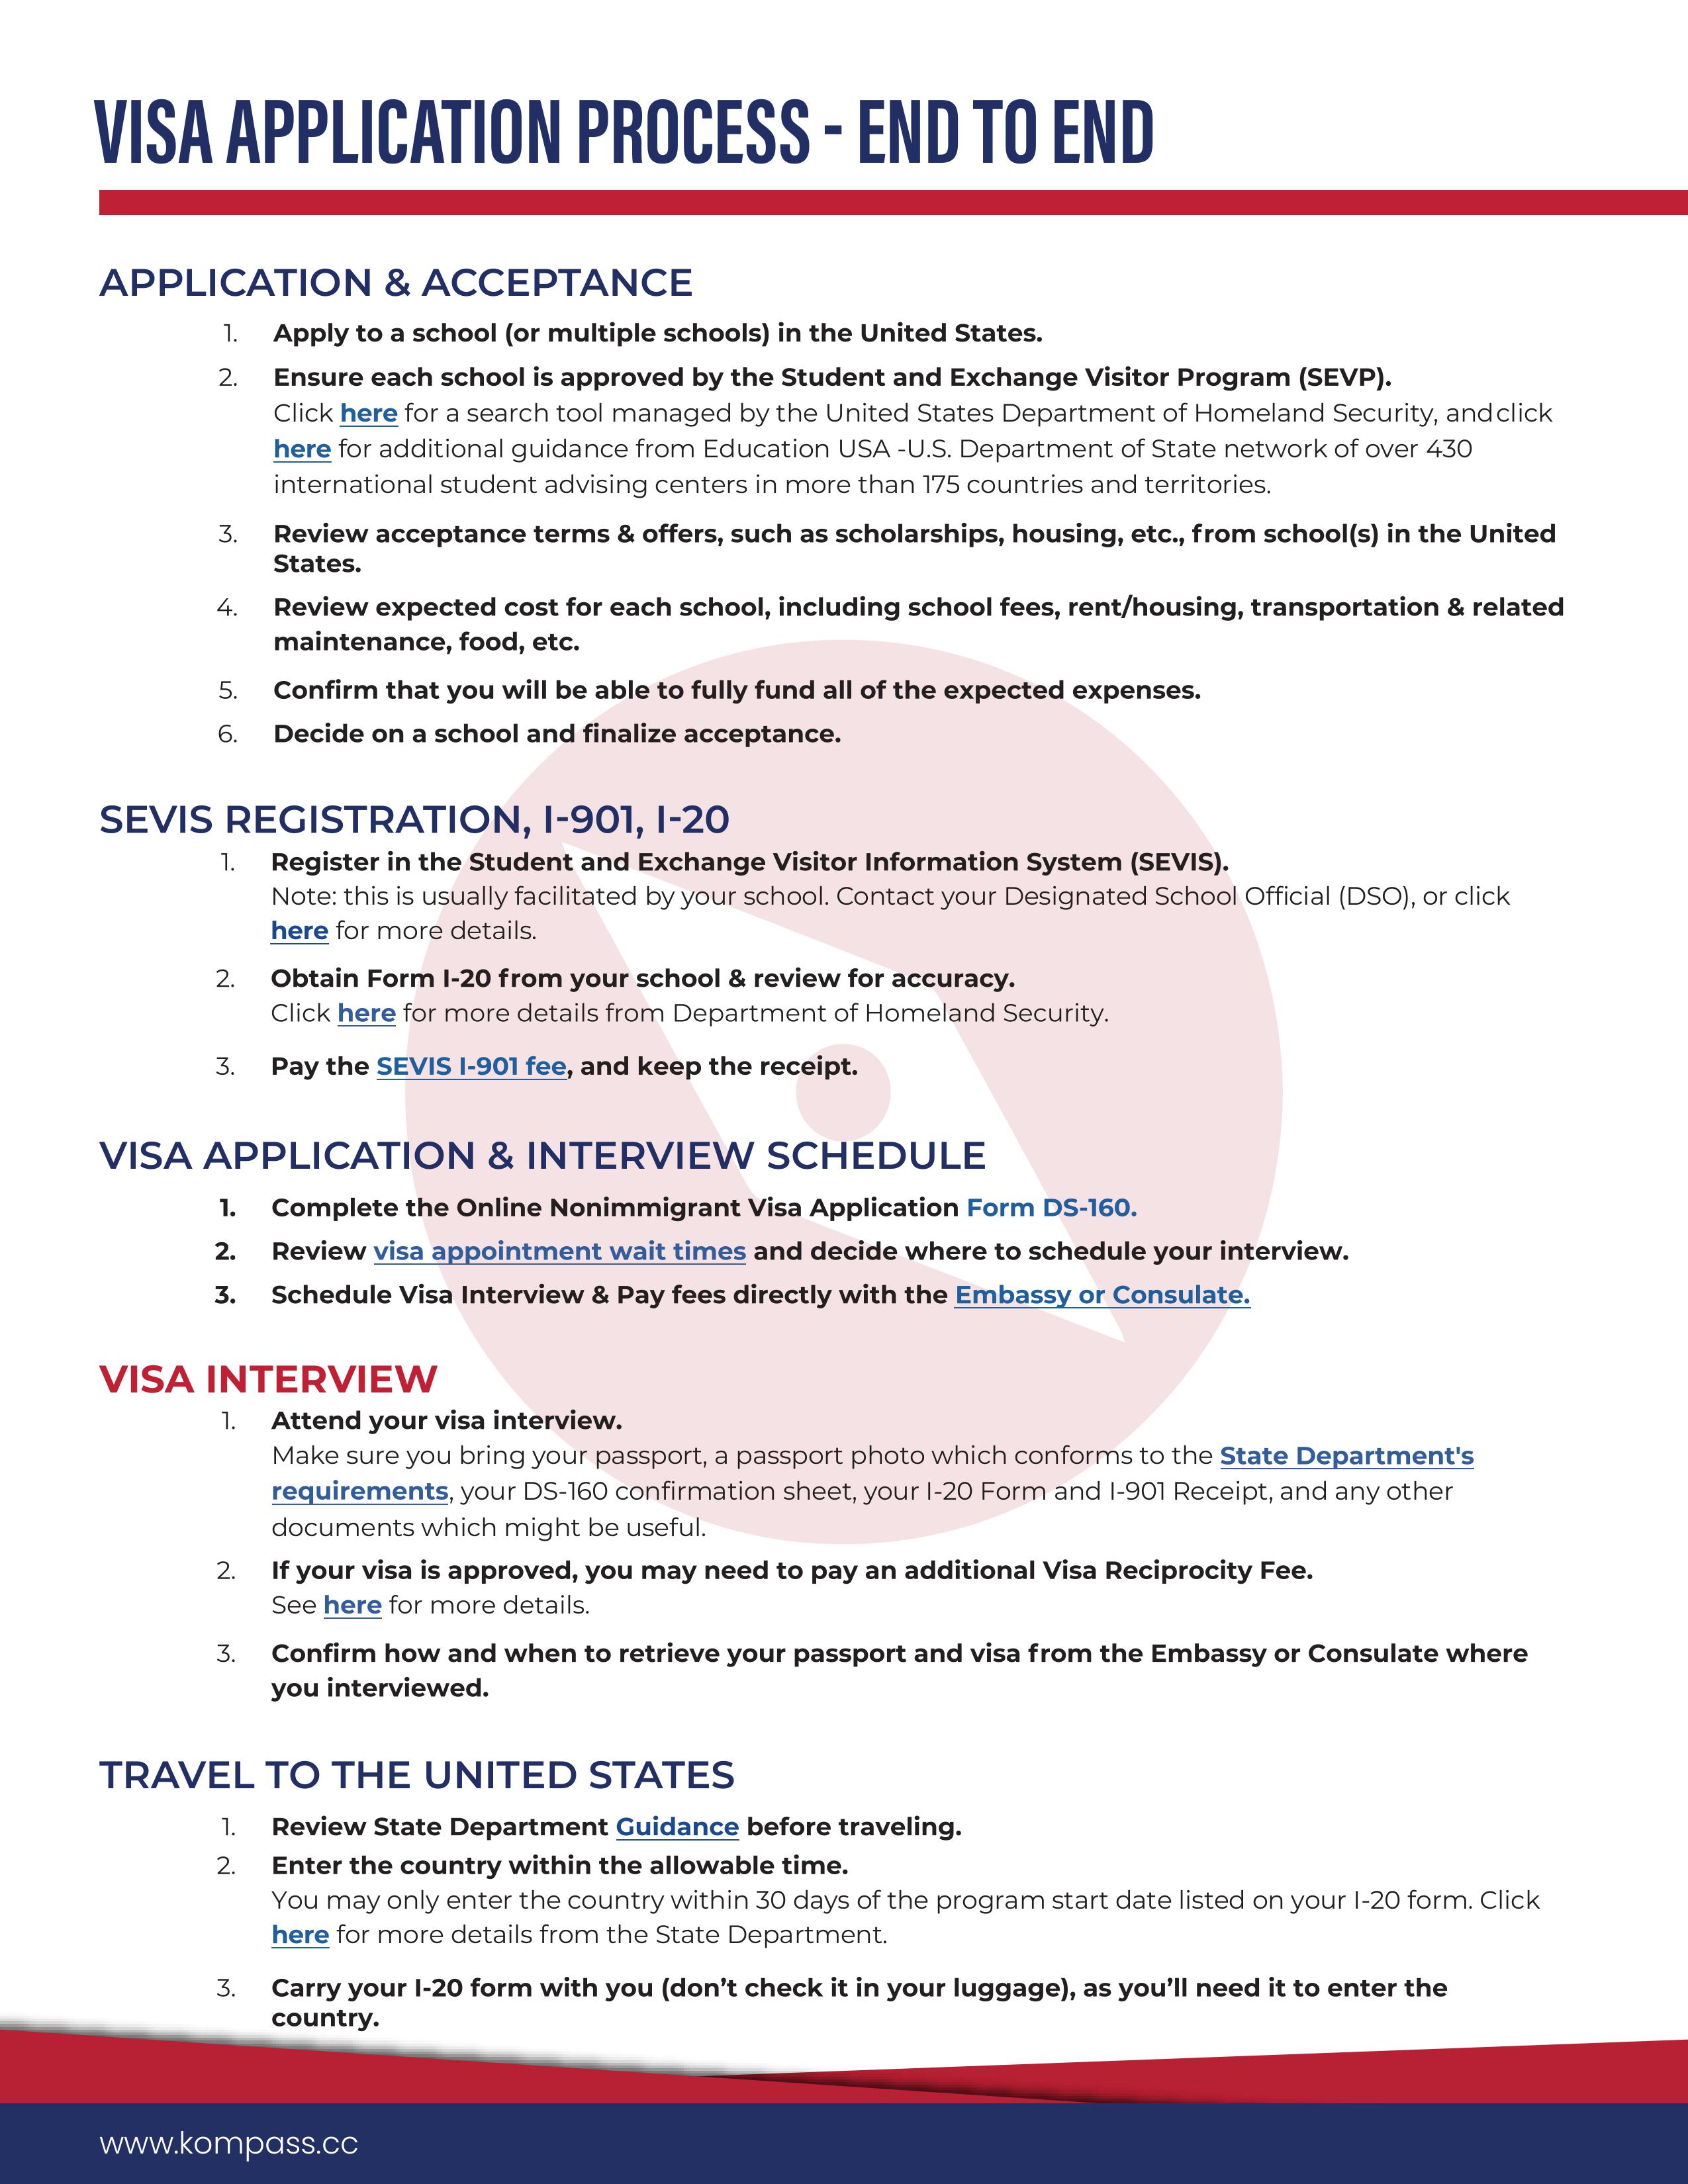
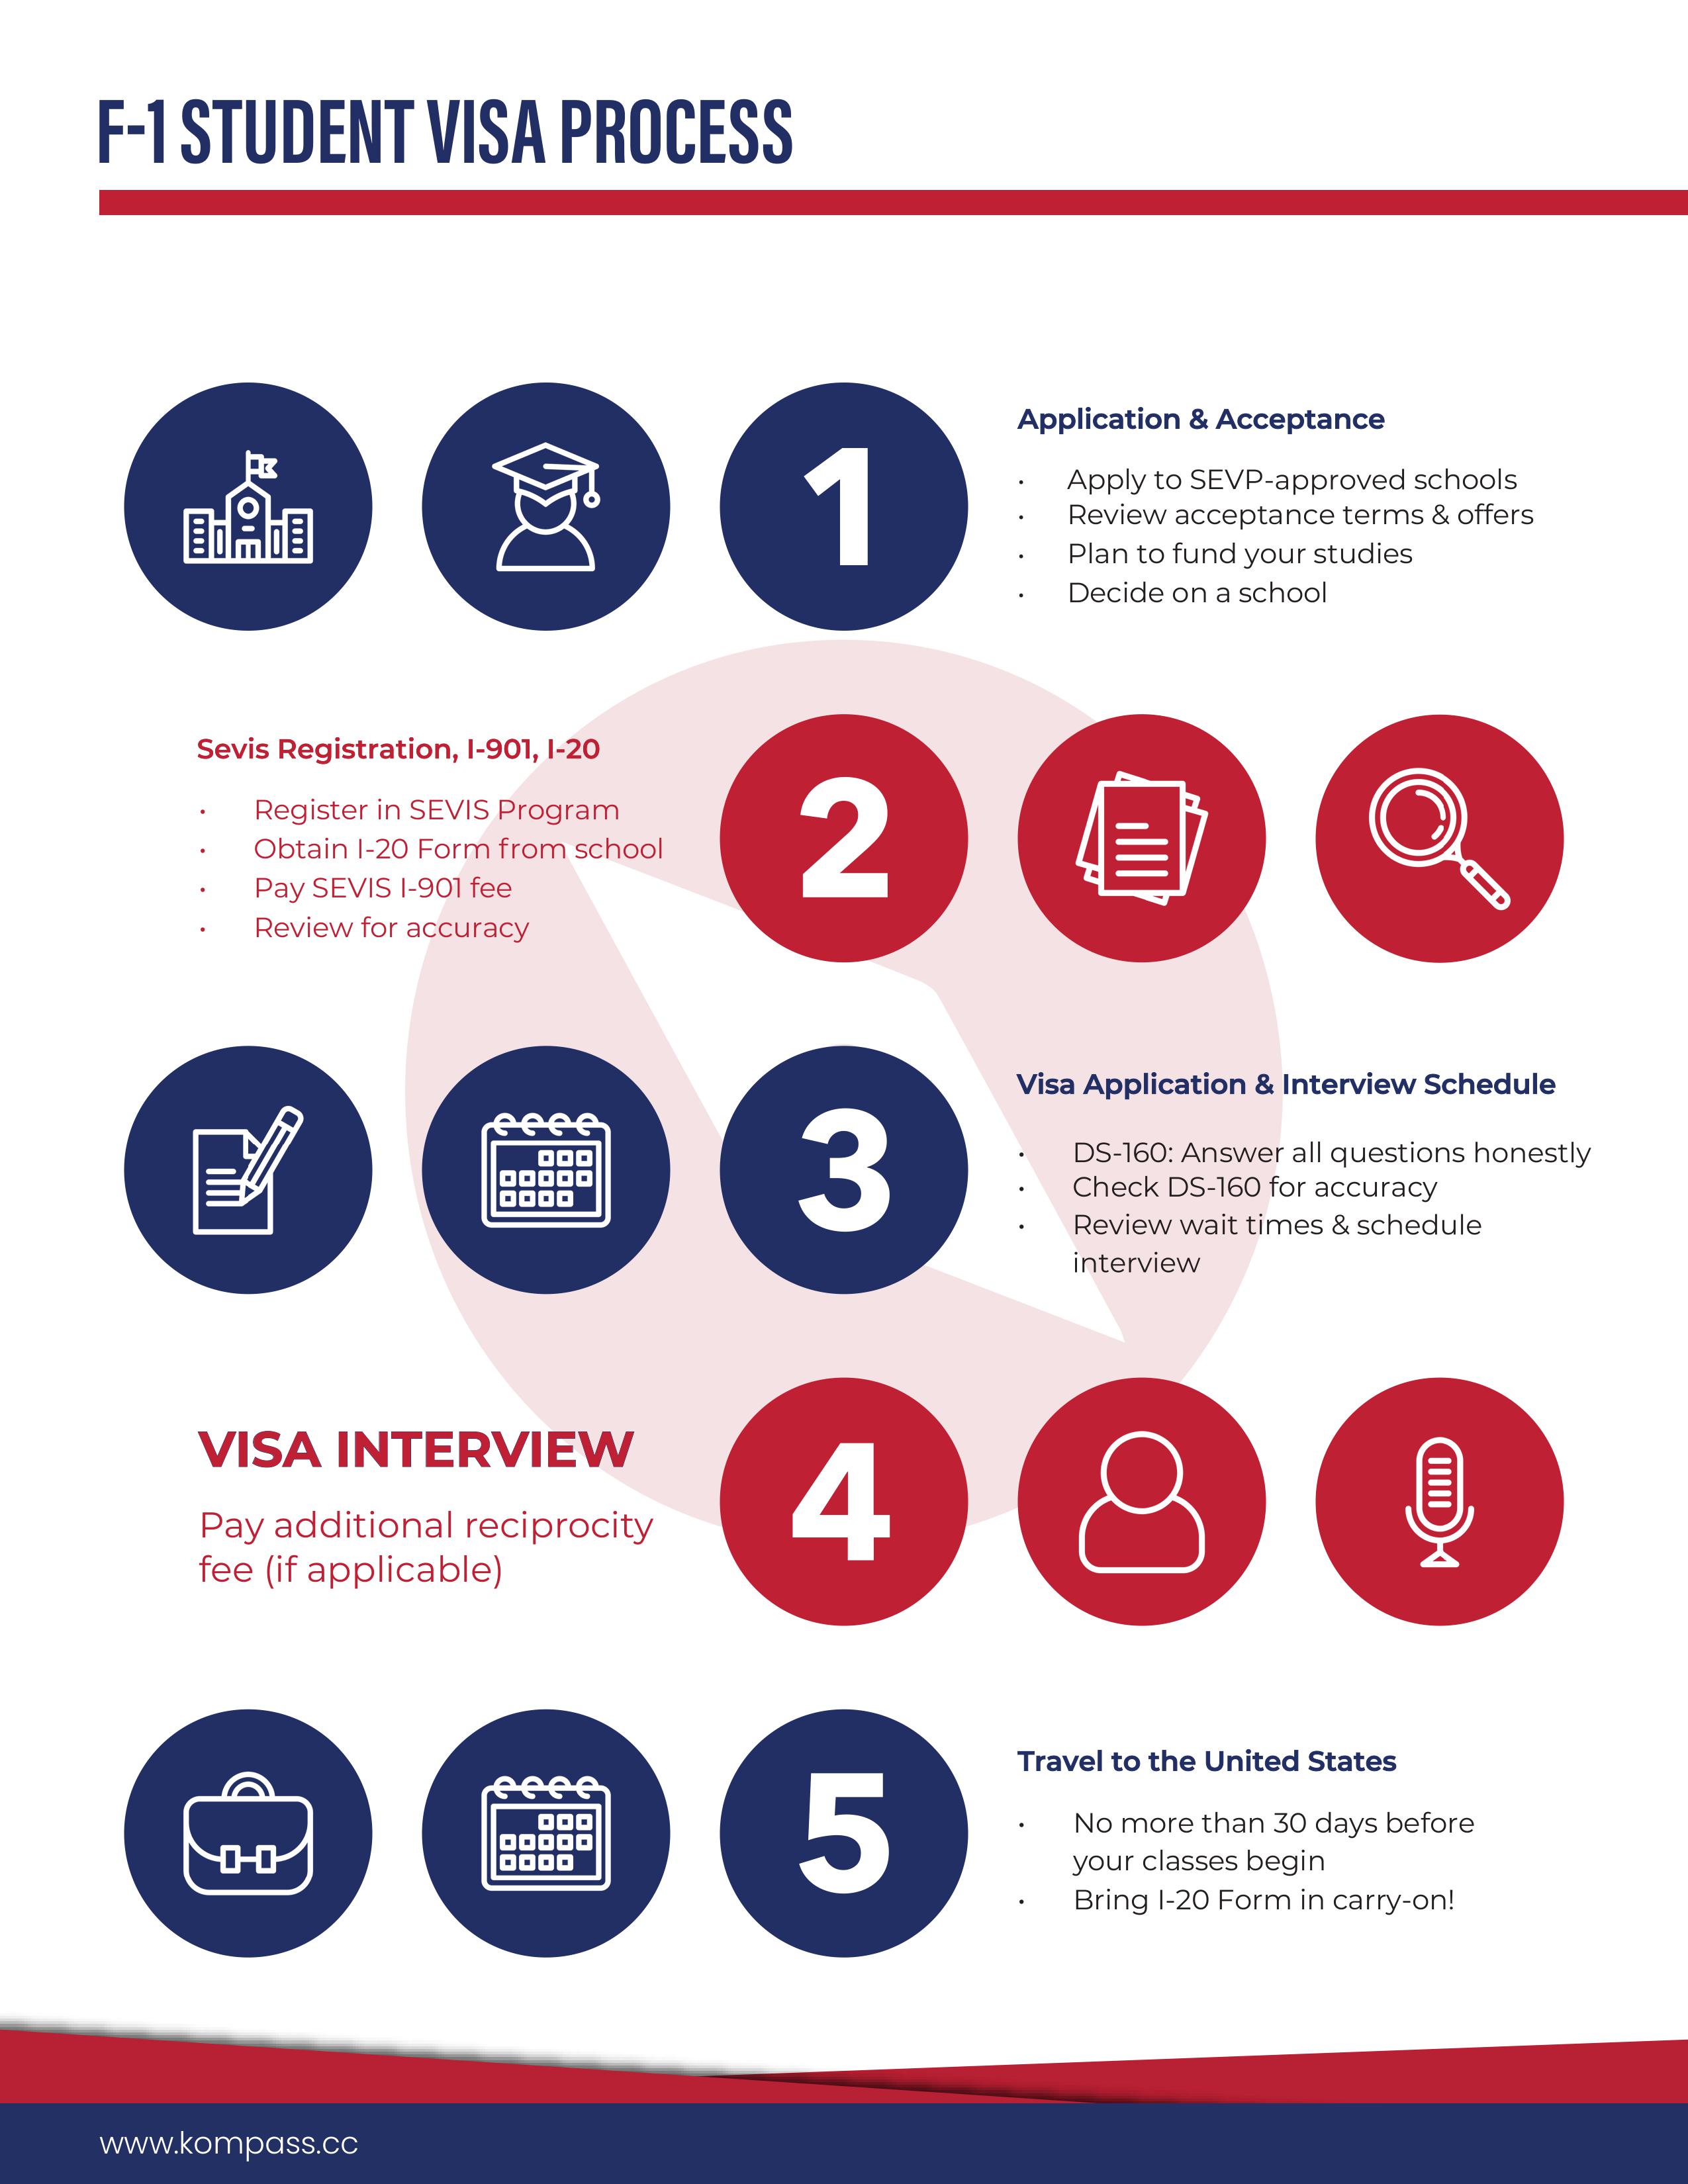
A – Apply to a U.S. School
Apply to a U.S. college or university: You must first be accepted into a Student and Exchange Visitor Program (SEVP)-certified school. This can be an accredited college or university, language training program, or other qualifying academic institution.
B – Receive Form I-20
Receive Form I-20: Once accepted, your school will send you a Form I-20 (Certificate of Eligibility for Nonimmigrant Student Status). This is the form required to apply for the F1 visa. The school must be certified by the U.S. government to enroll international students.
C – Pay the SEVIS Fee
Pay the SEVIS Fee: Before scheduling your visa interview, pay the SEVIS (Student and Exchange Visitor Information System) fee online at www.fmjfee.com. The fee is typically around $350, but may vary depending on the program. Keep the payment receipt.
D – Complete the DS-160 Form
Complete the DS-160 Form: This is the online application for a U.S. nonimmigrant visa. After filling out the form, you’ll get a confirmation page with a barcode. Save this page as you’ll need it for the visa interview.
E – Pay the Visa Application Fee
Pay the Visa Application Fee: The application fee for an F1 visa is around $160. You can pay this fee online or in person, depending on your country’s procedures.
F – Schedule Your Visa Interview
Schedule the Visa Interview: You must schedule your visa interview at the U.S. embassy or consulate in your home country. The wait times can vary, so try to schedule it early. Check the U.S. embassy or consulate website for available dates.
G – Prepare Your Documents
Prepare Required Documents: Gather all required documents for your visa interview:
Valid passport (valid for at least six months beyond your intended stay)
Form I-20 signed by your Designated School Official (DSO)
DS-160 confirmation page with barcode
Visa application fee payment receipt
SEVIS fee payment receipt
Passport-size photographs (meeting the specific requirements)
Transcripts, test scores (like TOEFL, IELTS, GRE), and proof of academic preparation
Financial evidence (bank statements, affidavits of support) to prove you can pay for your education and living expenses
H – Attend the Visa Interview
Attend the Visa Interview: During the interview, you will be asked about your intended course of study, the university you’ll attend, and your financial situation. The consular officer will assess whether you qualify for an F1 visa. Be prepared to explain why you want to study in the U.S. and how you plan to support yourself financially.
I – Receive Visa Approval or Denial
Receive Visa Approval or Denial: If approved, the consular officer will place a visa sticker in your passport. If denied, you will be given a reason for the refusal.
J – Pay the Visa Issuance Fee (If Applicable)
Pay the Visa Issuance Fee: In some countries, there may be an additional visa issuance fee once your visa is approved. You’ll need to pay this fee to have your passport with the visa sent back to you.
K – Prepare for Travel
Prepare for Travel: Once your visa is granted, you can travel to the U.S. up to 30 days before the program start date listed on your I-20.
L – Arrive in the U.S.
Arrive in the U.S.: Upon arrival, the Customs and Border Protection (CBP) officer will review your documents. If everything is in order, they will stamp your passport to mark your entry. You will also be enrolled in the SEVIS database.
M – Report to Your School
Report to Your School: After arrival, report to your Designated School Official (DSO) to confirm your enrollment. They will verify your status and complete the required paperwork.
N – Maintain Your Visa Status
Maintain Your Visa Status: Once in the U.S., you must comply with the rules of your F1 visa. This includes maintaining full-time enrollment, not working off-campus without authorization, and making timely progress toward completing your program.
O – Optional Practical Training (OPT)
Optional Practical Training (OPT): After completing your program, you may be eligible for OPT, allowing you to work in the U.S. in your field of study for up to 12 months (or 24 months for STEM fields). You must apply for OPT through your DSO.
P – Change of Status
Change of Status: If you want to change your visa status (e.g., from F1 to H1B for work), you can apply for a change of status with U.S. Citizenship and Immigration Services (USCIS). You’ll need to submit the appropriate forms and pay fees.
Q – Stay in the U.S. After Graduation
Stay in the U.S. After Graduation: After completing your program, if you are not applying for OPT or a work visa, you must leave the U.S. within 60 days.
R – Return to Your Home Country
Return to Your Home Country: If you complete your studies and don’t apply for OPT or further visa extensions, you will need to return to your home country within 60 days of completing your program.
S – Apply for a U.S. Work Visa (If Desired)
Apply for a U.S. Work Visa (If Desired): If you wish to continue working in the U.S. after completing your studies, you can apply for a work visa such as the H-1B visa.
T – Take Action to Extend Your Stay
Take Action to Extend Your Stay (If Applicable): If you need to extend your F1 visa (for instance, if your program takes longer than expected), contact your DSO for assistance.